1RM: The Retrospective
The LoungeBuddy Product Team recently concluded our inaugural Hackathon, where we had two days to work on anything we wanted: a project we had on the back burner, an idea we needed more time to explore, or a new skill we wanted to develop. Originally I was going to build a coded style guide for our different design components, but there was a small project that had always been on the back of my mind: learning iOS development.
I noticed a trend amongst designers who got started developing apps: almost everyone starts with a tip calculator. Two notable examples that I’ve actually used in the past were created by [Kevin Clark, Design Lead at Shopify][1] and [Patrick Wong, Design Manager at Lyft][2]. In hindsight, I understand why tip calculators are commonly used as starter projects; they are simple enough to be built in a relatively short amount of time, but complex enough that you’ll actually learn something.
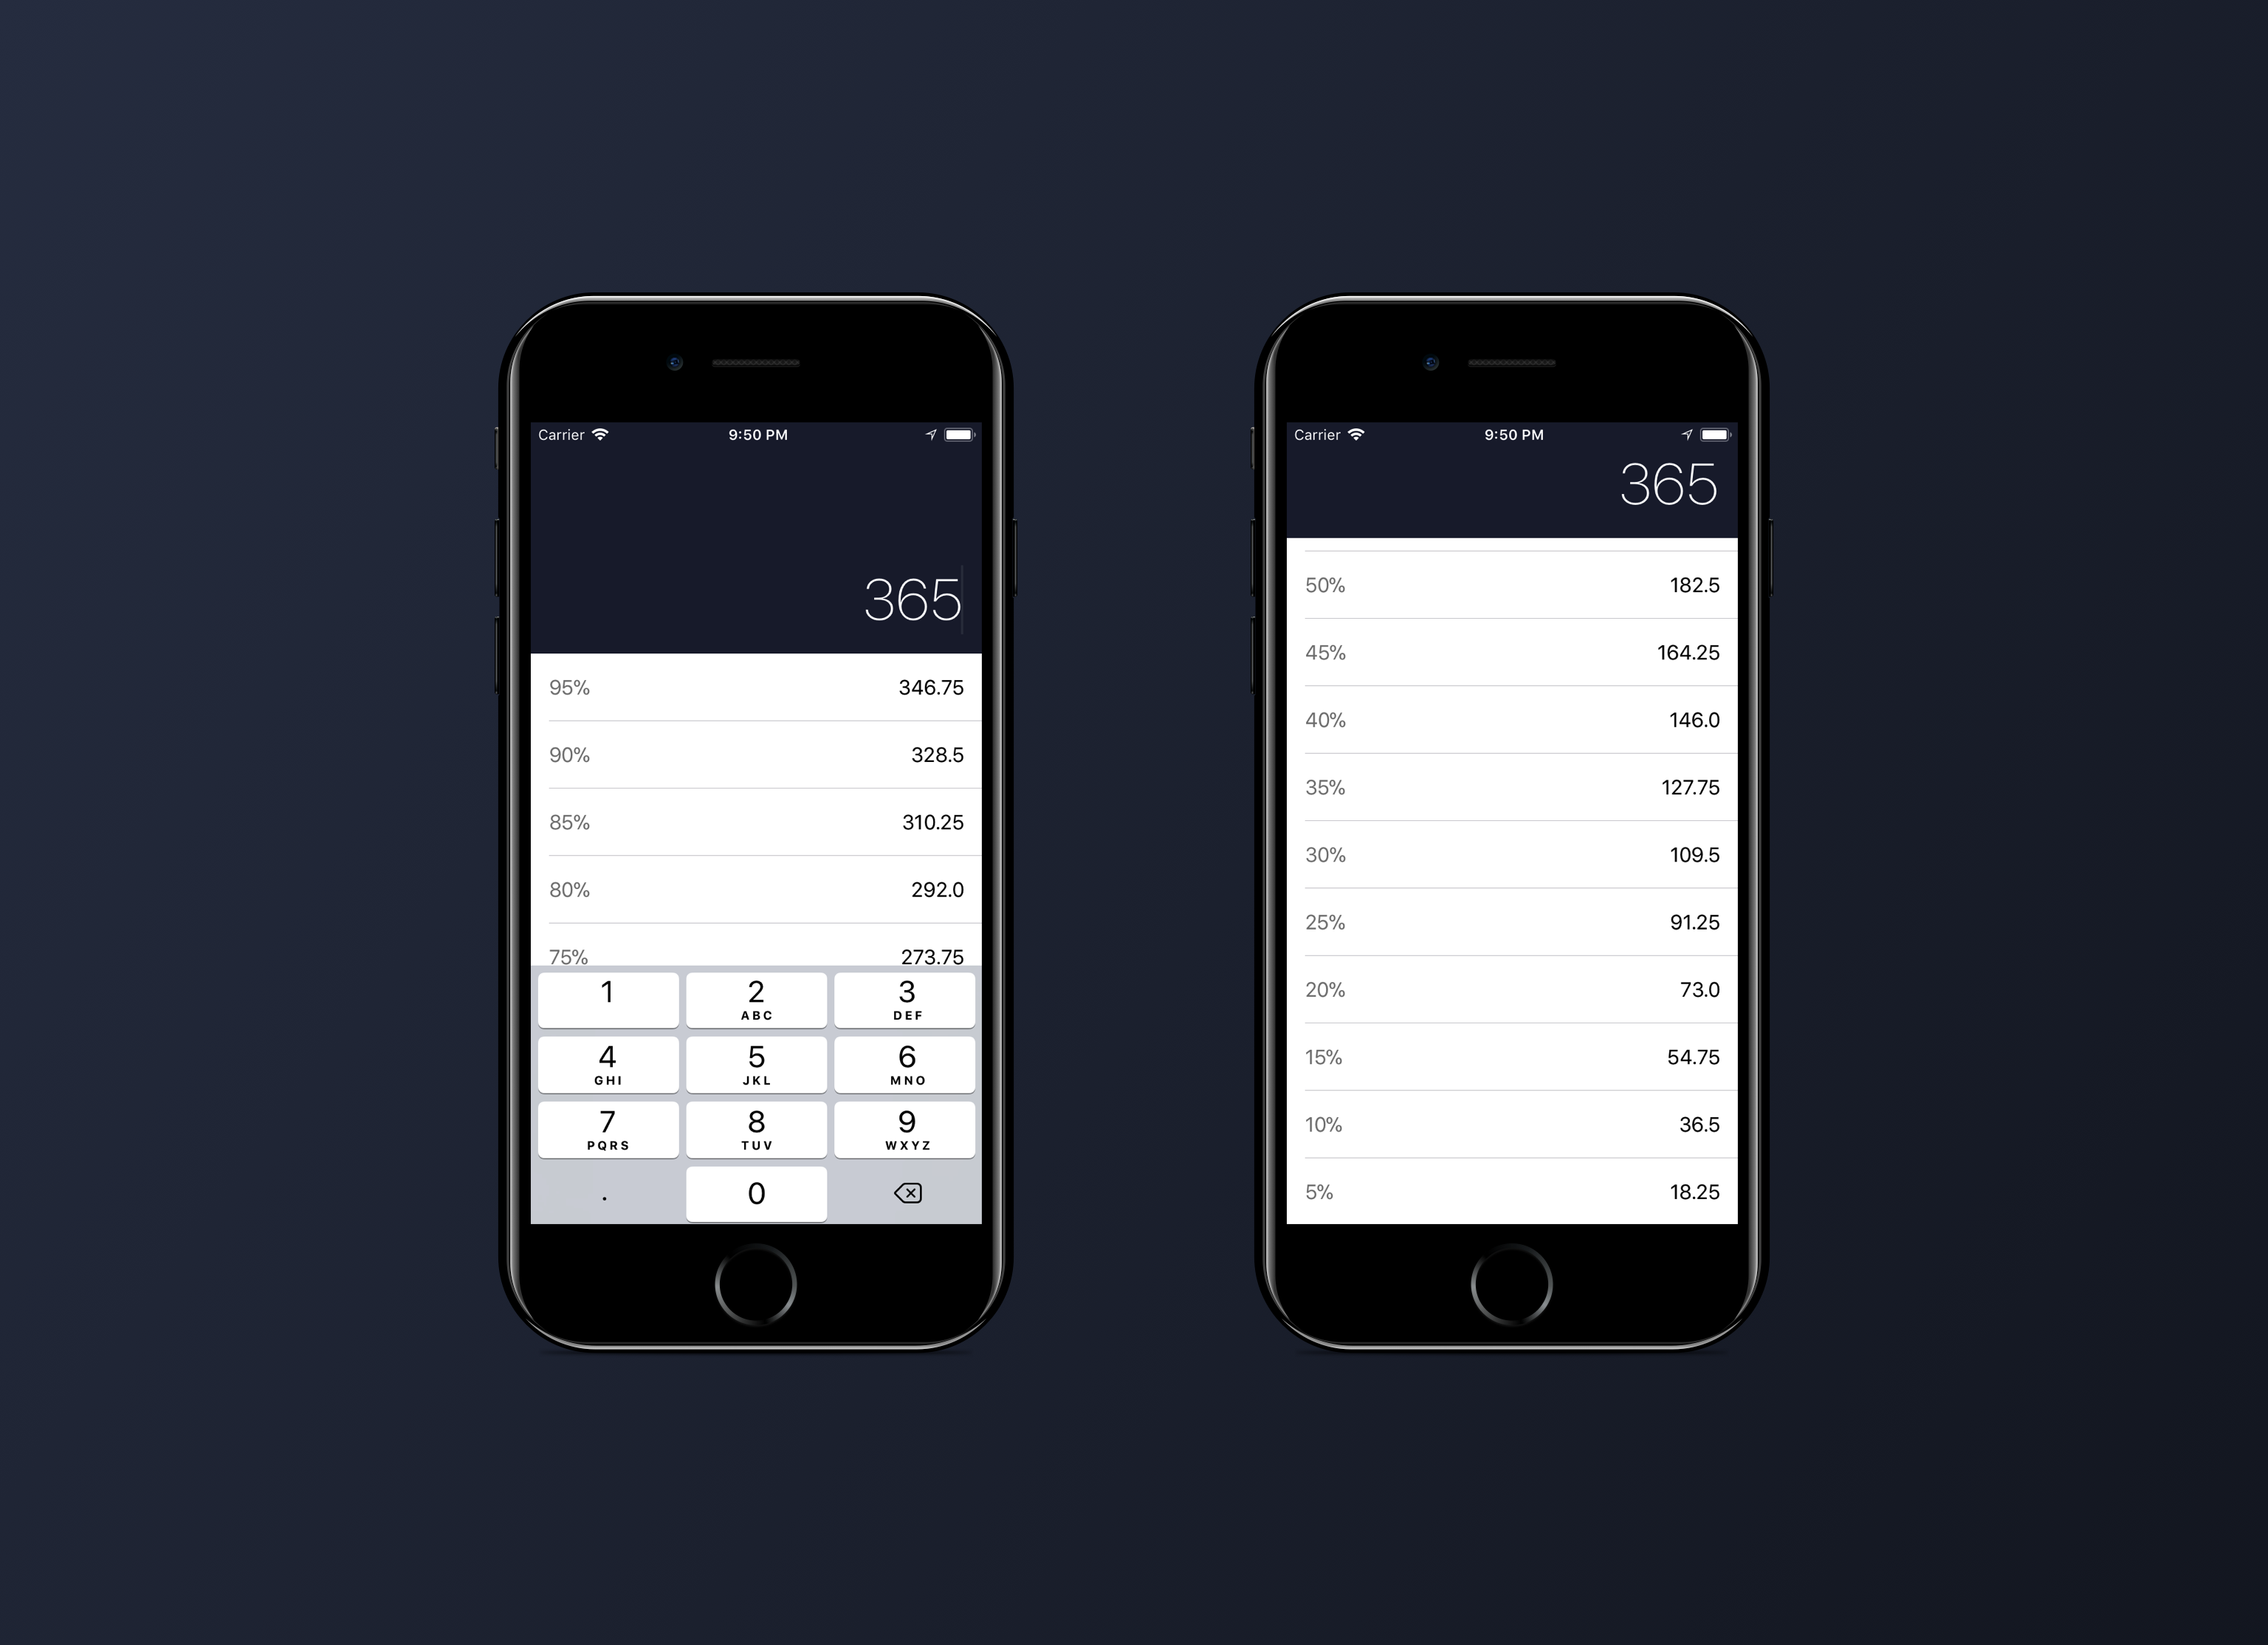
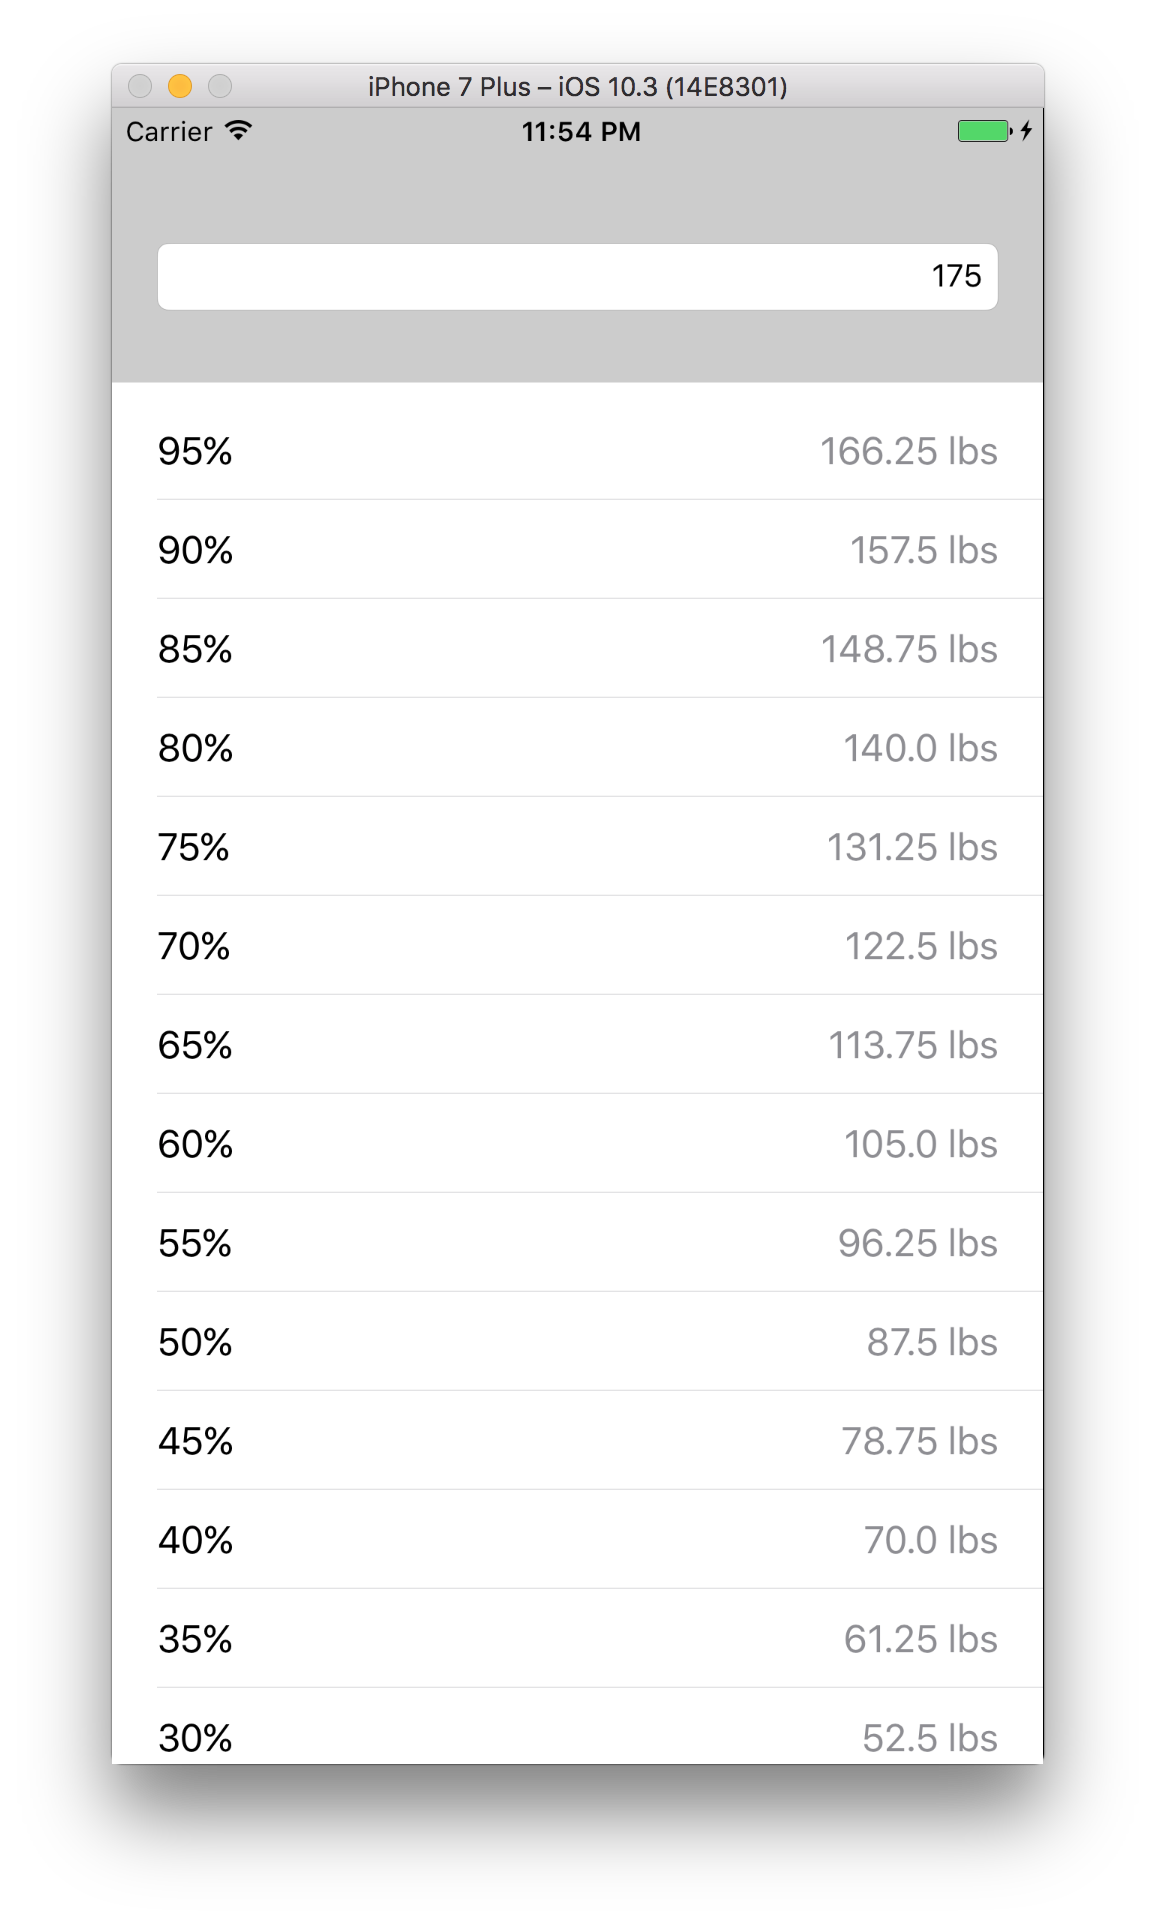
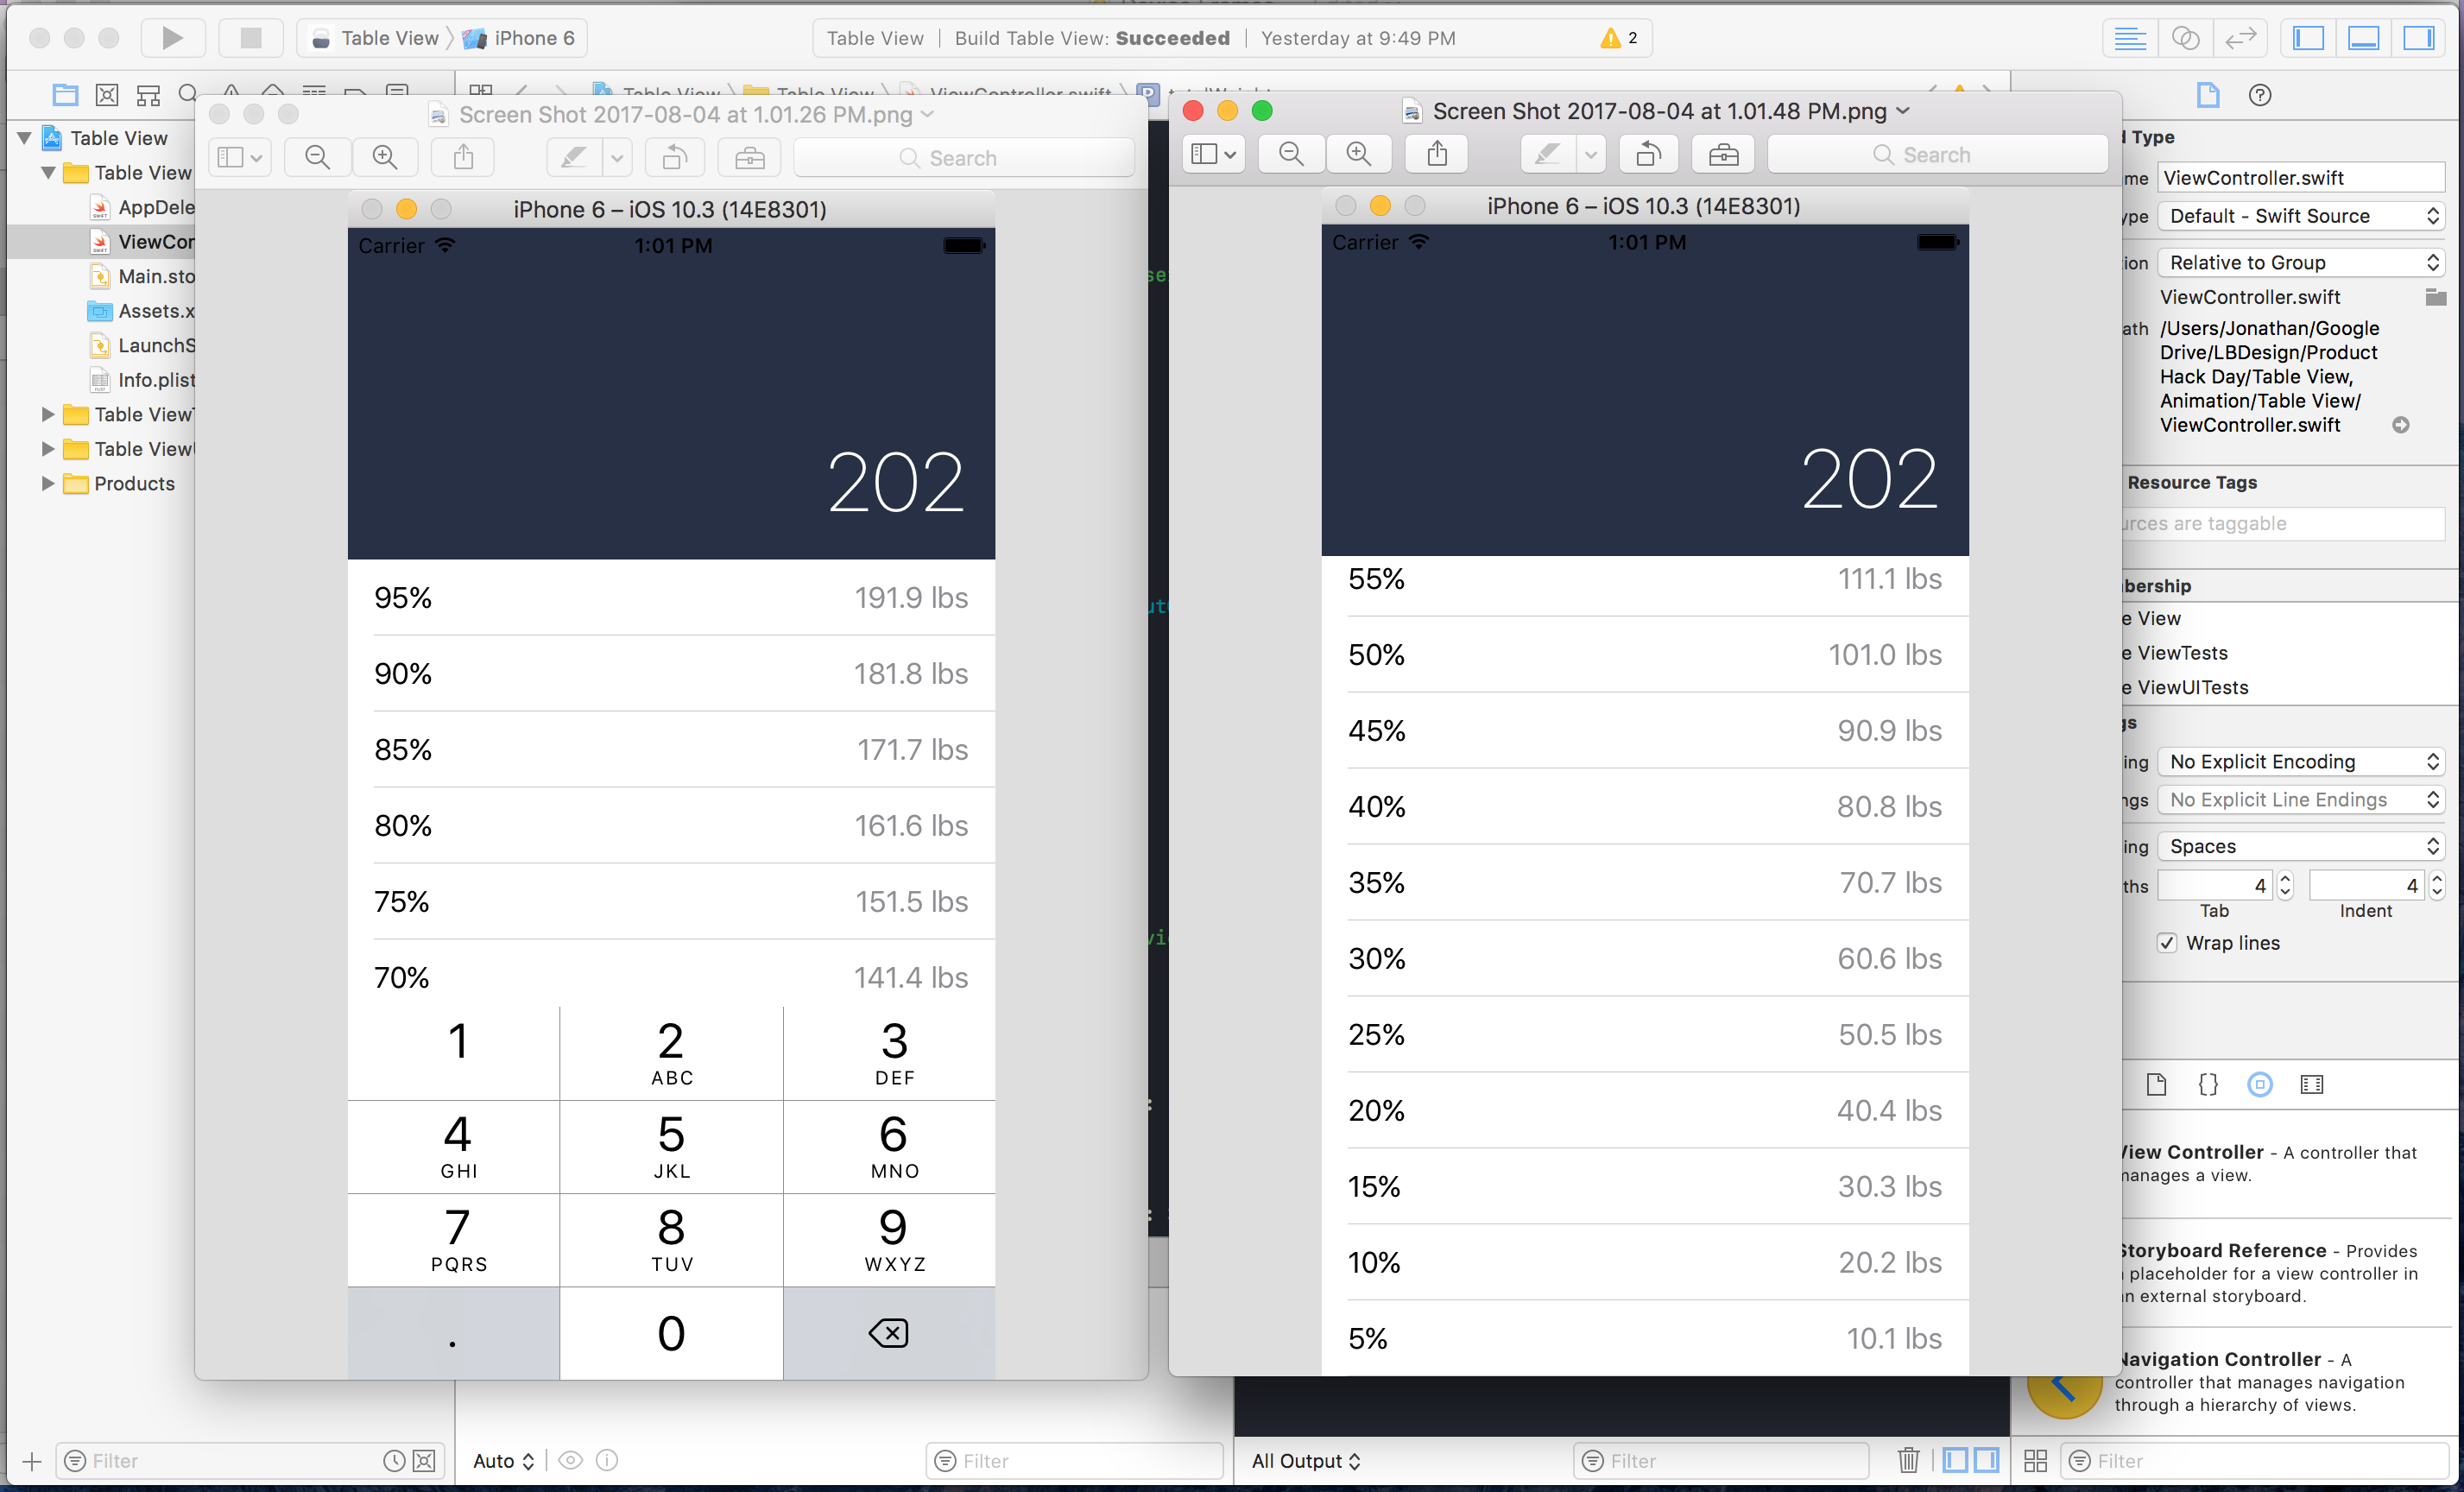
Originally I thought I would do the same, but I wanted to create something I would actually use. This is when I thought of the idea for 1RM — a simple weightlifting calculator that calculates the percentage breakdown of the total weight entered in nineteen increments, from 95% down to 5%. The app uses the fundamentals of a tip calculator, but displays the information in a unique way. Here's some screenshots of 1RM running in the simulator:
Having never written a line of Swift or Objective-C before this event, I wanted to take the time to write down how I went about creating an app in just two days, and the resources I used to help get 1RM for iPhone [on the App Store][3].
Day 1
In the excitement leading up to the Hackathon, I had already put together some mocks of what I wanted 1RM to look like. I wanted to make the most of the event, and so I planned the functionality I wanted to build over the two days.
- Calculate the percentage breakdown of the entered weight, from 95% down to 5%.
- Customize a standard Table View to show both the percentage and weight breakdown.
- Animate/collapse the header when a user scrolls down the list.
- When a user taps on the header, expand the header and launch the keyboard.
- Scale the font size used for the "total weight" as the user scrolls.
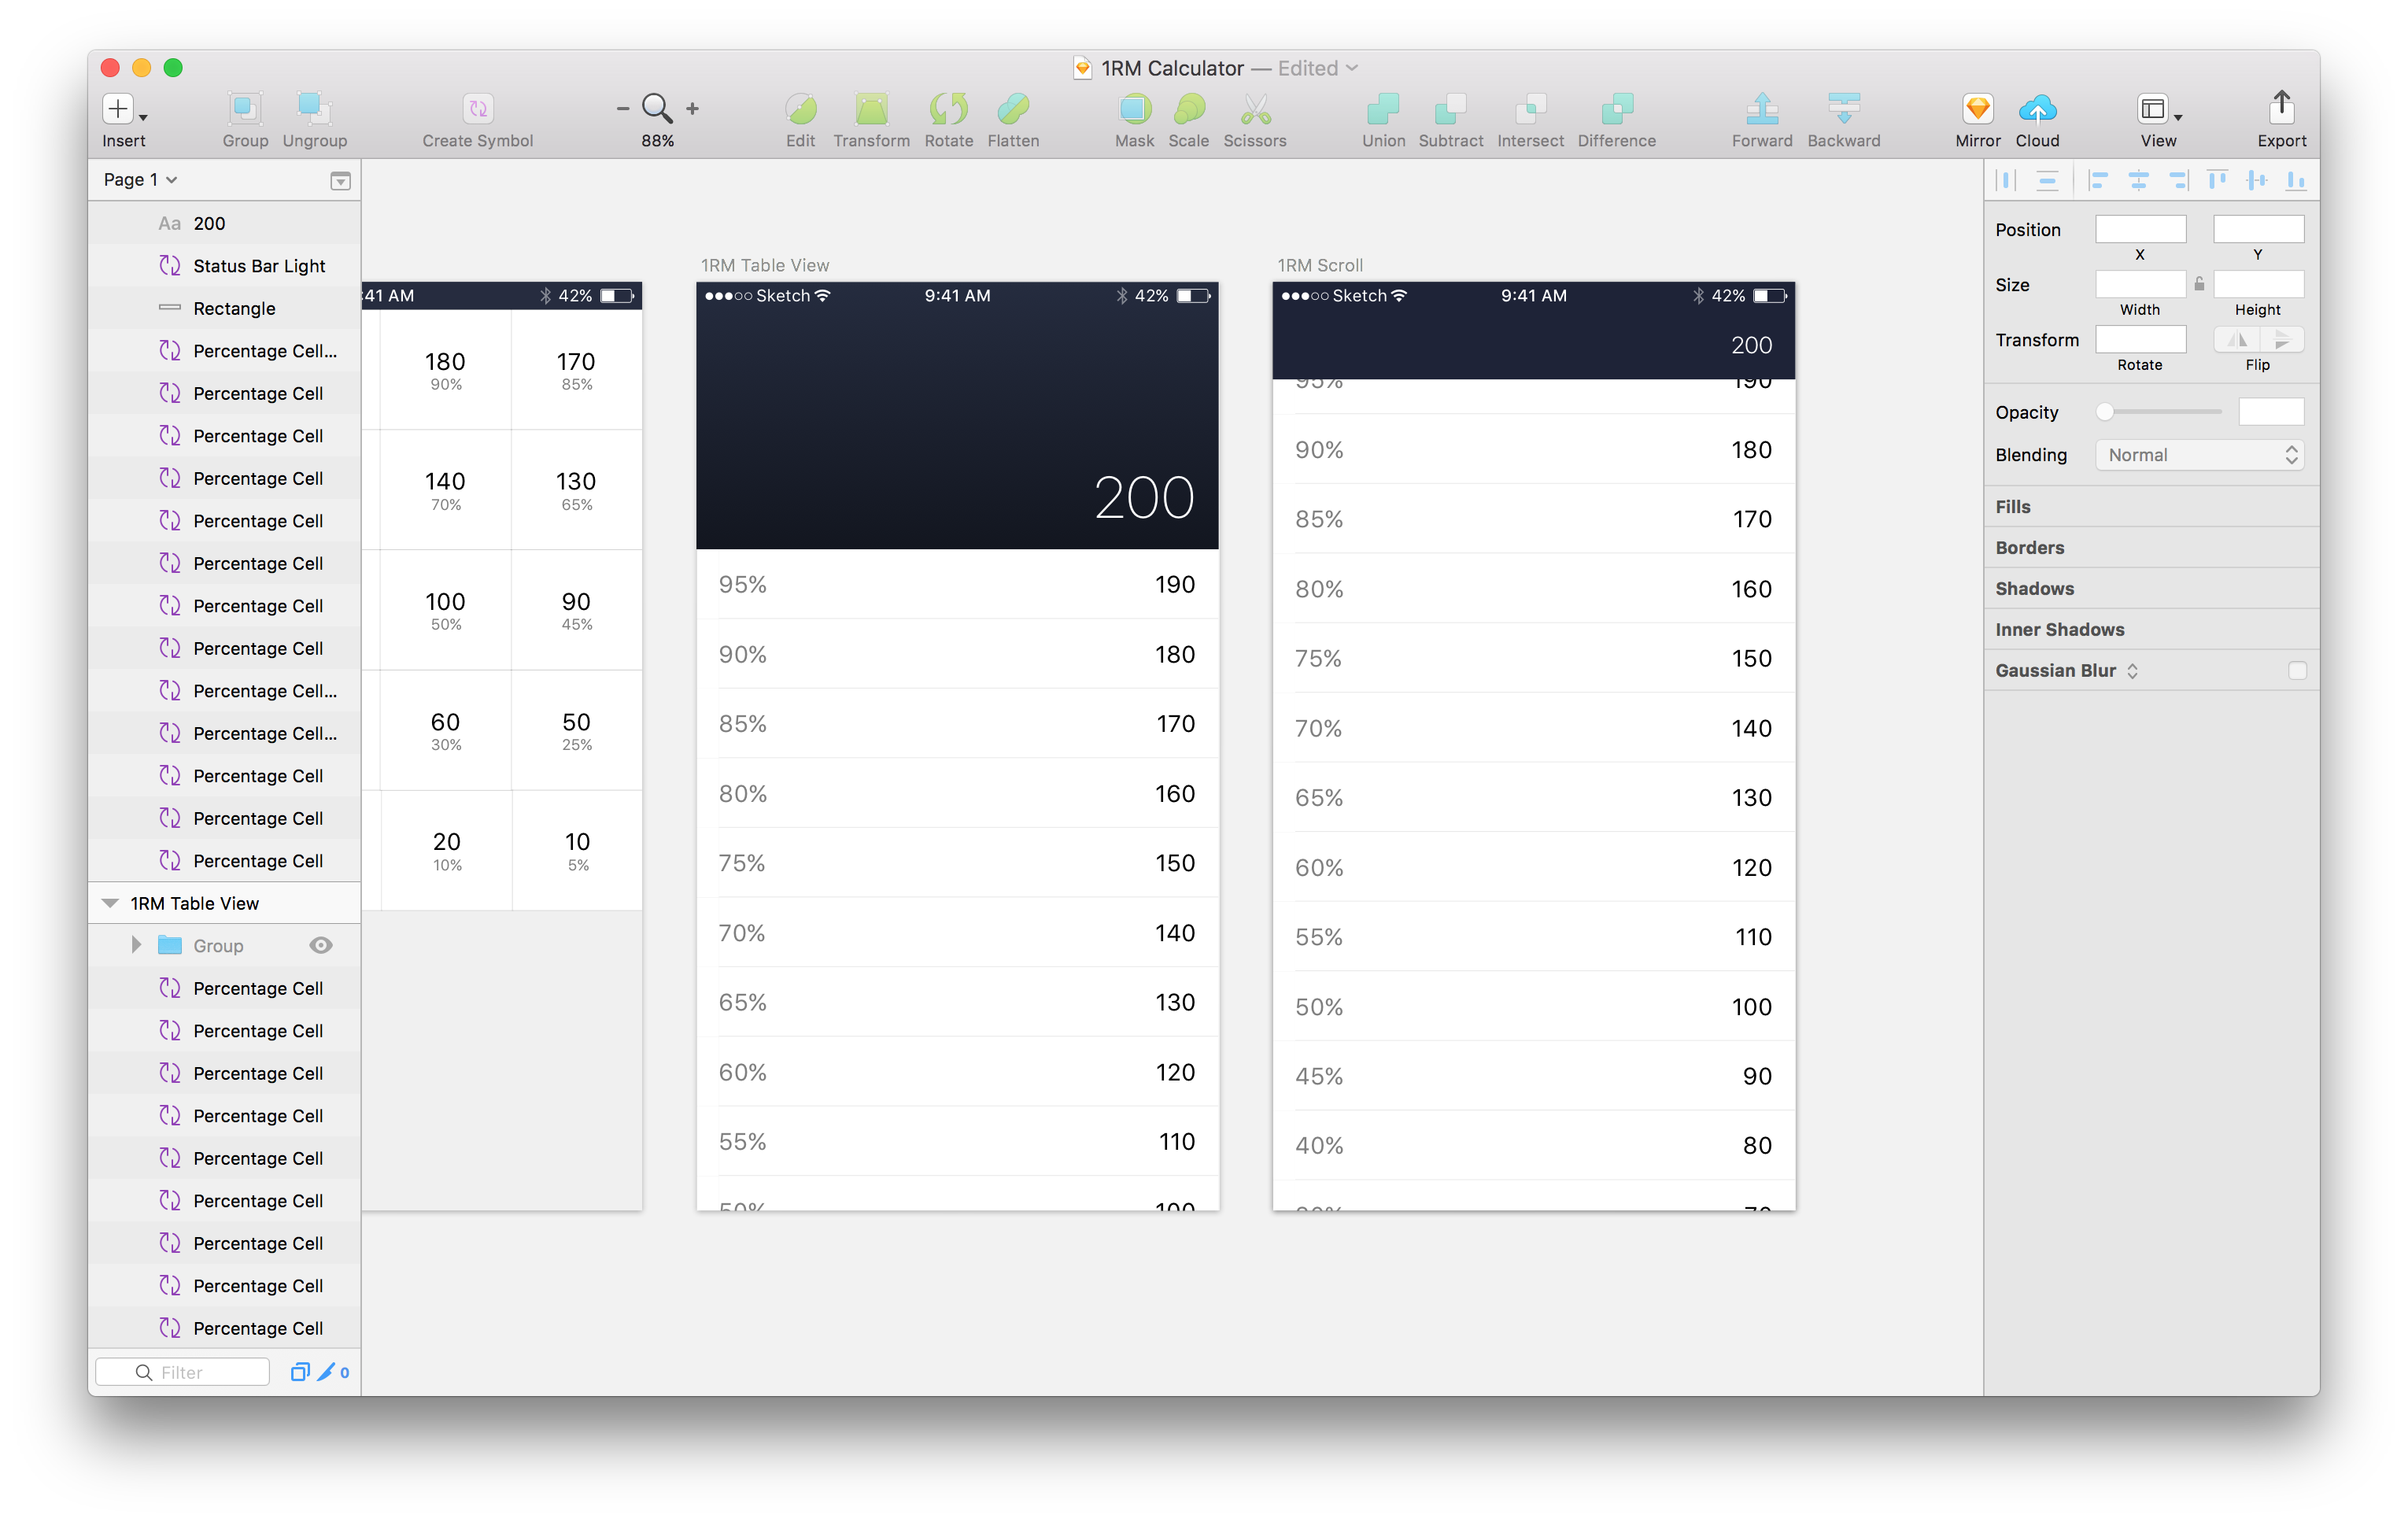
Here's what I ended up with in Sketch:
To get started, I knew I had to work through a simple Swift 3 “tip calculator” tutorial. I followed this two-part video tutorial by Junkie Labs, [Building a Tip Calculator Using Swift 3][4].
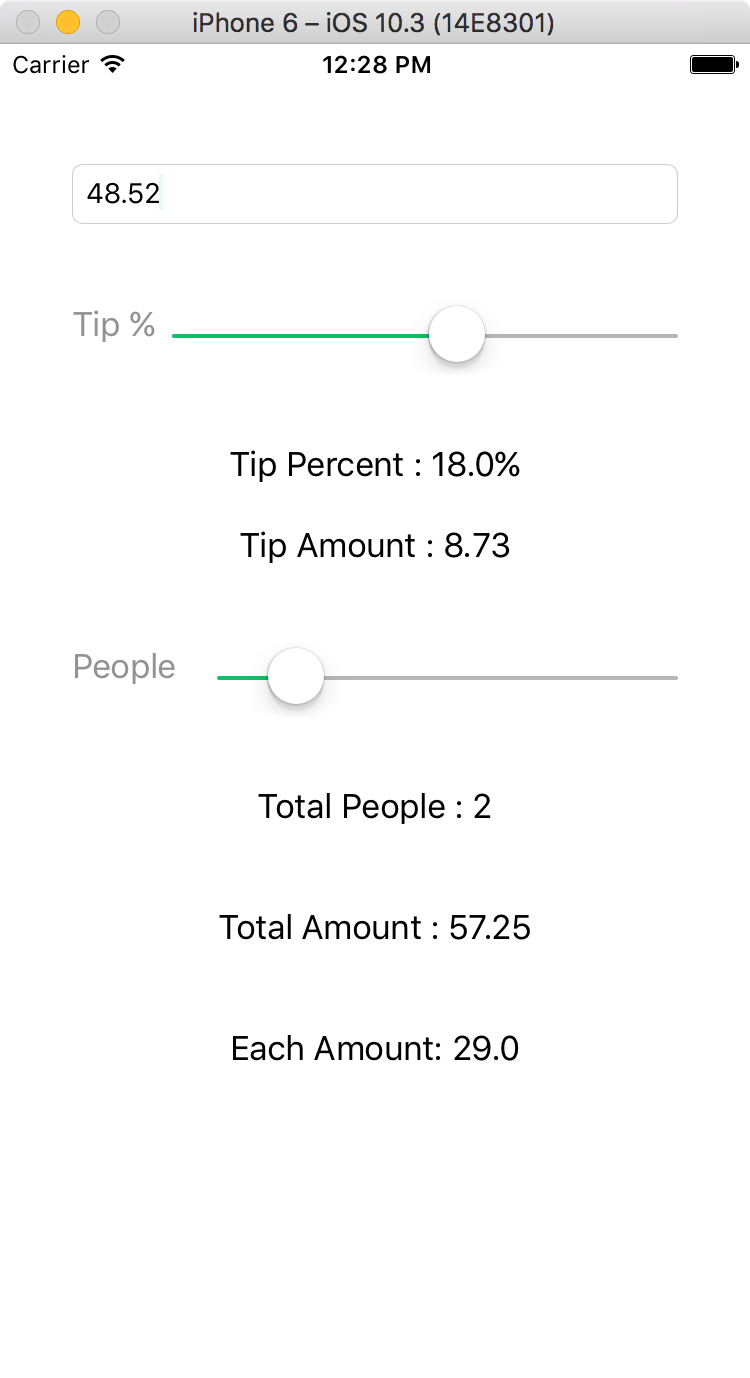
The tutorials aren’t difficult to follow, and when I was done, I had a working tip calculator (pictured below). It is important to stick with everything they show you in these videos; you can always make interaction and design changes on your own when you have an idea of what you are doing.
Now that I knew how to make a functional tip calculator, the next step was to learn about UITableViewControllers. Not only was this a key part of the design, I chose this visualization for the percentage breakdown because I know how versatile and significant Table Views are in iOS development.
Originally thought I would need to create custom Table View Cells, so I followed this tutorial by Jared Davidson, [Custom Table View Cells][5]. As it turns out, that was completely unnecessary; iOS has many default table cells you can use, including the Right Detail option often used in Settings.
If it’s built in, you should use it.
I switched gears and found another short tutorial, [How To Create A TableView In Xcode 8][6] by The Swift Guy, which shows you how to “print” a list of items in a Table View.
At this point I had everything I needed to start building my app. I was going to piece together everything I learned up to this point to build 1RM, but it felt like something was missing. Had I stuck with what I had learned in these tutorials, I would have manually created a list in code. Though functionally the same, it wasn’t what I wanted.
This is code after all, and I knew from experience that you should be able to do things automagically.
I spoke with a few people on the engineering team, and they were incredibly helpful in translating Swift-speak into something I could understand. If you’ve been following along with the tutorials above, I’ve created [the following gist][7] which shows you how to generate your Table View rows, and use them to inject content into the labels. Automagically.
Day 2
I had a day left of the Hackathon, and 1RM was functional. You could type a number, and the app would update the table view controller with a breakdown of what you entered. Today was going to be all about the looks; it was time to get 1RM to look like the mocks.
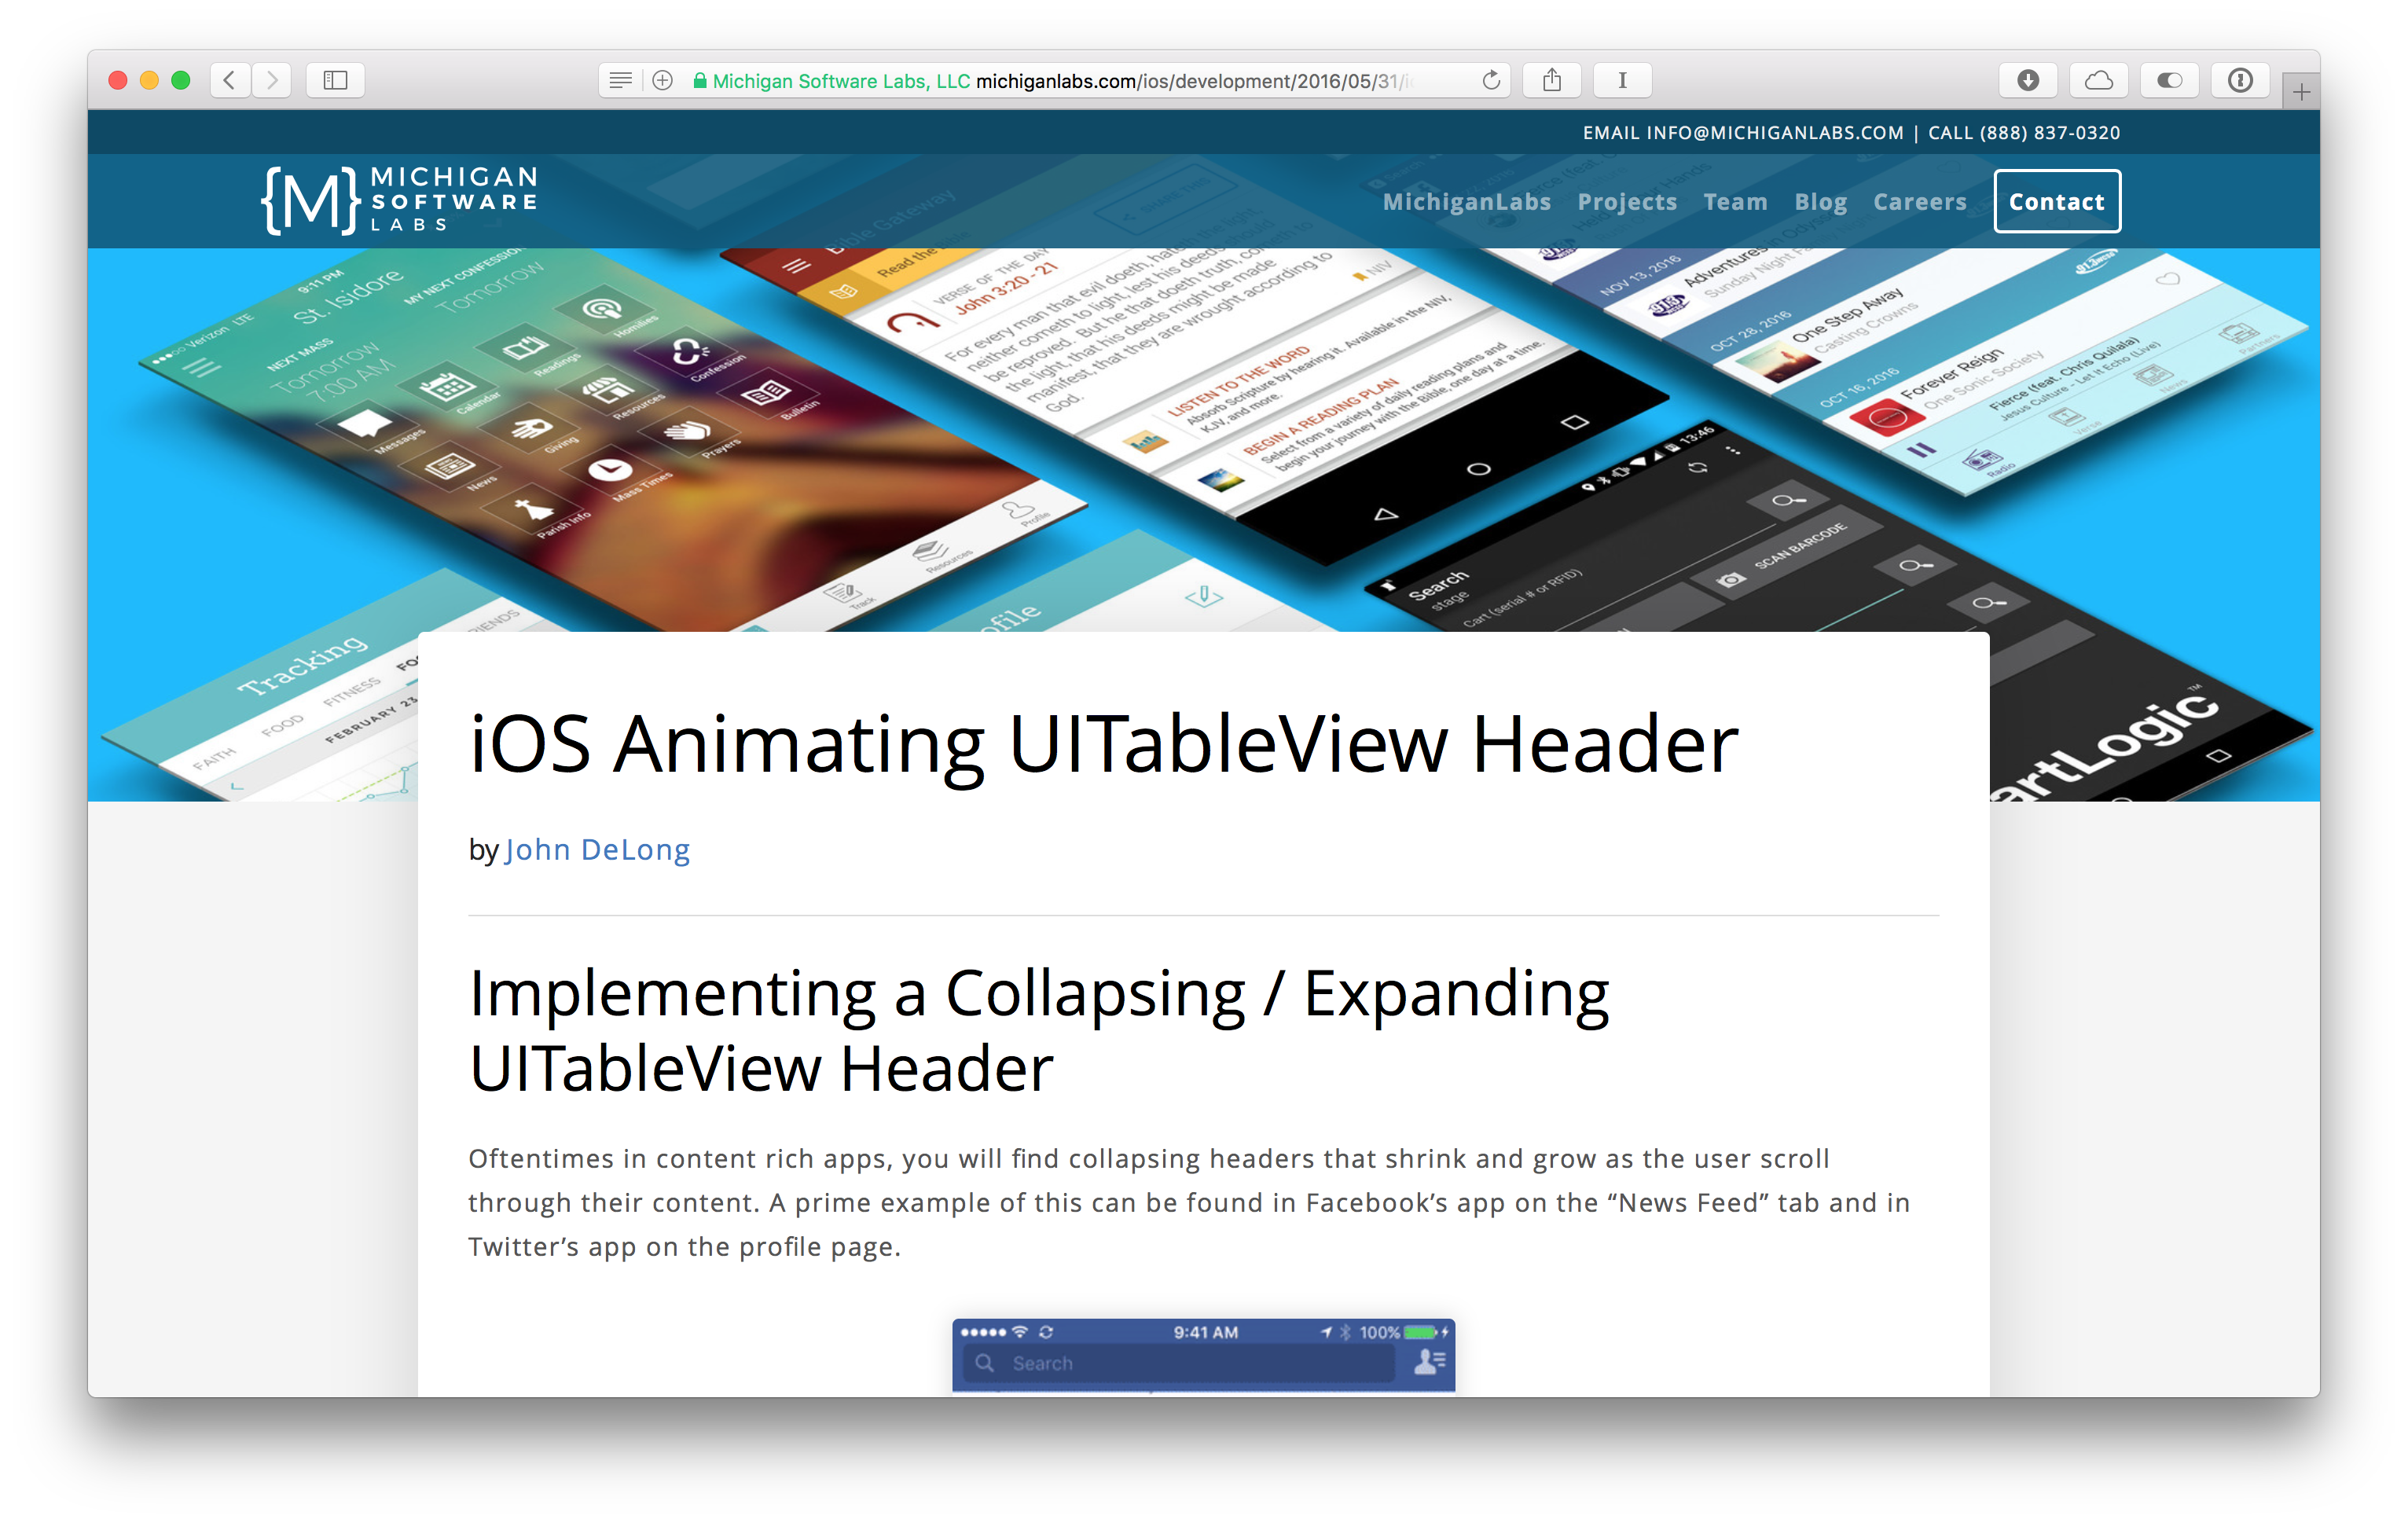
The final tutorial I used was this fantastic tutorial, [Implementing a Collapsing / Expanding UITableView Header][8] by John DeLong that gives you a step-by-step overview on how to animate a UIView and UITableViewController.
1RM was nearly there. I was done with tutorials, and I started searching Google to help me implement the details like font colors, tweaking animations, and customizing specific interactions.
You wouldn’t believe how many little things go into creating such a simple app, but there is so much power in being able to make something people can use. I think every (digital) designer comes to a point where creating images of what you want to be real isn’t enough anymore, and that’s when you take the time to learn how to make your ideas a reality. This is why there is such a huge debate around “should designers code.” It’s usually the designers who can code, and know how powerful of a skill it can be, who push others to do the same.
1RM is a simple weightlifting calculator for iPhone that I designed to teach myself iOS development. 1RM is available for free [on the App Store][9]. You can read more about the story behind 1RM in [my portfolio][10].
Note: Be careful which tutorials you follow; make sure they are written in Swift 3 or newer, otherwise you’ll quickly find out how unforgiving Xcode can be.